2013年12月23日 星期一

英雄聯盟 WIN7 佈景主題 完整步驟教學

原創於此  有分享於巴哈

所有這次用的到的程式
我都放在我的GOOGLE雲端硬碟
如需要可來我這下載  或是自行上網尋找
.cpl檔案室我自行製作保證無毒
其餘檔案接網路下載  請自行掃毒斟酌使用  如不信任可自行上網找檔

12/25更新時鐘更改教學
8~5步驟先進行哪個都沒差


1.點我下載 第三方主題限制破解Win7主題各類工具下載 (32 & 64 位元)~家庭版不適用
  (Universal Theme Patcher 、Win7文件夾背景補丁、Win7 獲得最高權限、Windows Theme Installer)(來源http://milo0922.pixnet.net/blog/post/33064698)


2.在開頭01的資料夾內選擇32 或 64位元破解
按右鍵「以管理員身份執行」
按「OK」繼續


此視窗主要說明需要破解及已破解檔案數,按「是」便可進行修改

破解方法只需於3個檔案右側按「破解」,完成後重新開機即可


3.在 [步驟1] 下載的檔案解壓後的 [Wi7 獲得最高權限  添加右鍵權限操作] 資料夾內

找到並使用[添加管理員取得所有權右鍵菜單]登錄檔

去C:windowssystem32裡面的explorerframe.dll取得管理員權限(點右鍵有[管理員取得所有權])


4.在02 資料夾圖片破解>win7文件夾背景補丁>Windows Theme Installer 內

執行Windows Theme Installer v 1.1.exe勾選   ExplorerFrame.dll      點旁邊Browse  
目標指向02 資料夾圖片破解>win7文件夾背景補丁  32位  或  64位 裡面的ExplorerFrame.dll
點Install Theme  

重開機

5.開始安裝LOL主題
點我下載主題完整包並解壓
(來源http://yorgash.deviantart.com/art/League-of-Legends-the-Game-Visual-Style-420915106)

複製final_pack_by_yorgash-d6ylo6aThemes裡面的資料到
C:WindowsResourcesThemes貼上

5-1
下載我提供的LoLGAME.msstyles檔案
我已經拆封幫修改過字型跟大小
直接複製到C:\Windows\Resources\Themes\LoLGame這裡
取代原有的LoLGAME.msstyles

左下角時間格式字型大小最佳化設定

如果時間前面有AM PM 上午 下午會跑出來
可以去設定隱藏
[控制台]>[地區及語言]>[其他設定]>[時間]
把下面時間格式裡面的(簡短時間 . 完整時間)後面格式改成開頭沒有TT的  
TT開頭就是上下午  想要24小時制得改成大寫HH開頭   12小時改成hh開頭
(下面都有標記法的意義解說)
套用>確定

5-2
在工具列點內容
建議下面紅線部分這樣設定才能顯示完整效果
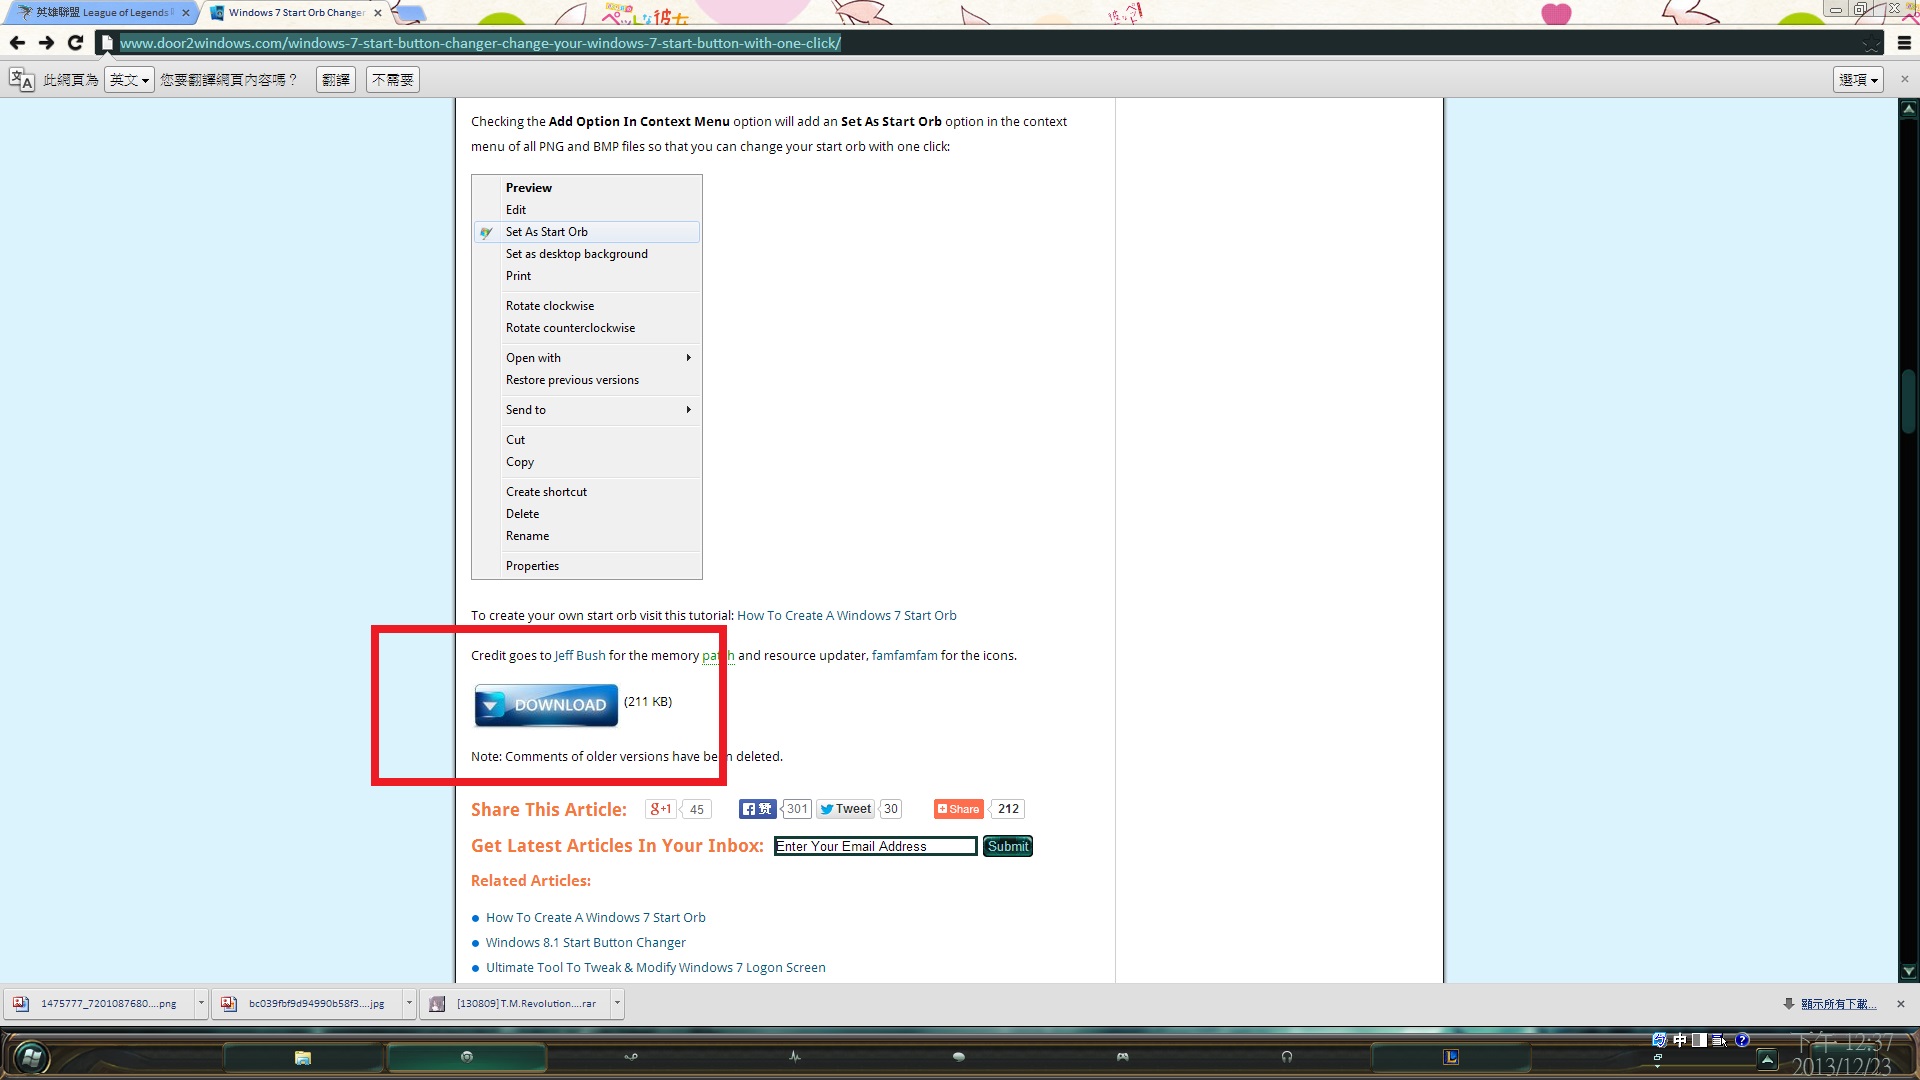

6. 更改[開始]按鈕
點我下載Windows 7 Start Orb Changer v5
點選Download 進入網頁之後就會自動下載了
(巴哈m284ck6cjp6(奶瓶淚)提供)


7. 解壓後執行Windows 7 Start Orb Changer v5.exe
點選[CHANGE]
目標指向主題包final_pack_by_yorgash-d6ylo6aStartOrb資料夾去尋找你喜歡的換上吧


Windows 7 Navigation Buttons Customizer
這個程式可以改資料夾內上一頁下一頁等小按鈕圖案
主題包內已經有相關的圖檔
路徑(final_pack_by_yorgash-d6ylo6aExplorerFrame)
這應該稍微看 下載頁面的說明就看得懂使用方式了


[12/25] 更換時鐘小教學
8. Theme Manager - Windows 7
這程式可把作者主題包提供的所有東西都更換上  包含時鐘!!

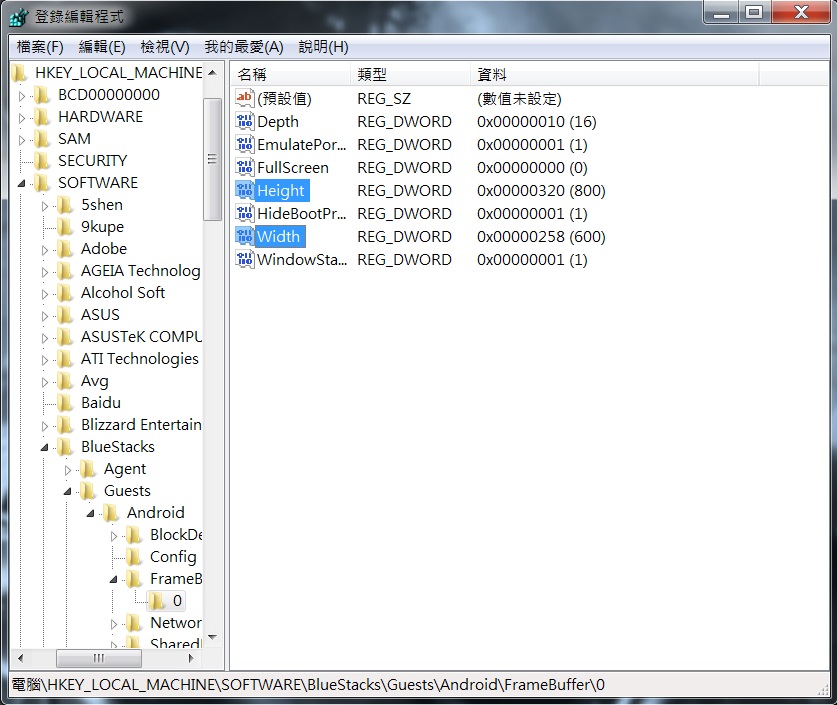
我把作者主題包裡面TIME資料夾內提供的timedate.cpl打開檢查過了  
這檔案是32位元系統用的
所以64位元的W7會失敗  無法替換成功
我自己利用他TIME資料夾內提供的圖檔製作了一份64位元用的timedate.cpl
利用Theme Manager - Windows 7 已經順利可以替換上了

先去C:WindowsSystem32把裡面的timedate.cpl備份起來
(我是複製一份改成timedate.cpl.bak  這樣一看就知道是備份檔)
Theme那目標指向步驟5複製到C:WindowsResourcesThemes裡面的LoLGame.theme

Timedate那邊
假如你是32位元可依直接指向主題包內TIME資料夾內的timedate.cpl
假如你是64位元  請指向我提供的timedate.cpl

Shell32部分作者有提供檔案更換  是控制台相關的小圖樣更改
但是以後WINDOW更新會有麻煩 除非你都不更新 不然不建議更改


記得前面要打勾
然後按下INSTALL THEME
他會要你為這主題命名一個名稱  用預設的即可

然後右邊那框框就會出現你剛安裝好的主題
選取以後選下面的APPLY THEME  就更換完成了
[實測兩台虛擬機接成功執行]

9.更改資料夾圖示
這應該不用教吧   路徑是icon裡面自己慢慢對照就好


P.S.  如想要自己更改個人喜歡的字型可參考下圖去修改
第1個紅線是字型   第2個是字體大小

如果覺得整體的字體太小   把上圖大小8的都改成10   10的都改成12
這樣差不多就很適合了

2013年12月15日 星期日

Bluestacks


[教學] 如何關閉開機時自動啟動BlueStacks的功能?


第1步 按下「Win」+「R」,輸入「msconfig」。
備註:Win鍵即是位在Ctrl或Fn鍵旁邊,長得和Windows的旗幟一樣的一顆鍵。
經查看發現程式預設僅配給 768 MB,加上系統內建佔用的所剩不多,
我們可以透過以下方式來增加系統配給的記憶體容量。
 
步驟1:按下『Win+R』 或是 『開始→執行』 
步驟2:輸入 regedit 並按下確定
步驟3:找到 HKEY_LOCAL_MACHINE 並展開
步驟4:展開 SOFTWARE
步驟5:展開 BlueStacks
步驟6:展開 Guests,並點選 Android 
步驟7:點兩下右邊視窗中的『Memory』 
步驟8:選擇十進位,並將768改為您預使用的記憶體容量 
    ※注意:需考量您系統記憶體加上BlueStacks是否夠用 

 
步驟9:重啟 BlueStacks 即完成
 
透過安兔兔測試,畫面如下,您可以發現 RAM 修改前與修改後有些差別

開始→執行搜尋 regedit 並按下確定
找到 HKEY_LOCAL_MACHINE(通常在最下面)
展開 SOFTWARE
展開 BlueStacks
展開 Guests
展開Android
展開FrameBuffer點選0
其中裡面有兩項參數需要修改,各別是WidthHeight,也就是對應到寬度與高度。

我的螢幕解析度是1920x1080
所以我BS的高設800寬設600(底數要記得先設十進位再改)
修改完成之後,必須從Windows右下角通知欄離開BlueStacks,再重新啟動它
這樣修改後的解析度才會生效。


第2步 請確定您擁有足夠權限,然後切換到「啟動」頁。圖片中不小心選錯了,服務頁是沒有效果的。(權限不足嗎?[Windows 7]啟用系統管理員 Administrator 帳戶
第3步 取消勾選這兩項,並按下確定即可。


【密技】修改 BlueStacks 預設記憶體容量


相信不少人都遇過,不論電腦用的再好,使用 BlueStacks 都會不順,
經查看發現程式預設僅配給 768 MB,加上系統內建佔用的所剩不多,
我們可以透過以下方式來增加系統配給的記憶體容量。
 
步驟1:按下『Win+R』 或是 『開始→執行』 
步驟2:輸入 regedit 並按下確定
步驟3:找到 HKEY_LOCAL_MACHINE 並展開
步驟4:展開 SOFTWARE
步驟5:展開 BlueStacks
步驟6:展開 Guests,並點選 Android 
步驟7:點兩下右邊視窗中的『Memory』 
步驟8:選擇十進位,並將768改為您預使用的記憶體容量 
    ※注意:需考量您系統記憶體加上BlueStacks是否夠用 

 
步驟9:重啟 BlueStacks 即完成
 
透過安兔兔測試,畫面如下,您可以發現 RAM 修改前與修改後有些差別

【密技】修改 BlueStacks 視窗大小


開始→執行搜尋 regedit 並按下確定
找到 HKEY_LOCAL_MACHINE(通常在最下面)
展開 SOFTWARE
展開 BlueStacks
展開 Guests
展開Android
展開FrameBuffer點選0

其中裡面有兩項參數需要修改,各別是WidthHeight,也就是對應到寬度與高度。

我的螢幕解析度是1920x1080
所以我BS的高設800寬設600(底數要記得先設十進位再改)

修改完成之後,必須從Windows右下角通知欄離開BlueStacks,再重新啟動它
這樣修改後的解析度才會生效。

2013年12月4日 星期三

strlen

 /var/www/opencart/admin/controller/catalog

category.php    商品目錄
attribute.php   商品屬性
attribute_group.php   屬性分類

將下列3~64字元限制改成

     foreach ($this->request->post['attribute_description'] as $language_id => $value) {
              if ((utf8_strlen($value['name']) < 3) || (utf8_strlen($value['name']) > 64)) {
                $this->error['name'][$language_id] = $this->language->get('error_name');
              }

50字元以下

    foreach ($this->request->post['category_description'] as $language_id => $value) {
            if (utf8_strlen($value['name']) > 50)  {
                $this->error['name'][$language_id] = $this->language->get('error_name');
            }


2013年11月21日 星期四

電腦安裝genymotion Android模擬器

1.到下列網址的genymotion官方網站註冊帳號並下載2.0.1安裝主程式
http://www.genymotion.com/

2.下載

Android SDK ADT Bundle 2013.10.30 免安裝版 - 免費Android程式開發工具

3.下載執行此步驟
http://azo-edu.blogspot.tw/2013/11/ova-genymotion-20-play.html

4.設定導向SDK
參考網址http://azo-edu.blogspot.tw/2013/08/genymotion-android.html
第一次使用要先設定ADB(Android Debug Bridge)連線,按「Yes」繼續。(這裡指的就是第21步驟我們解壓縮的Android SDK ADT Bundle


按「Settings」視窗中的「Browse」按鈕。


將它指向(第23步驟中)解壓縮後的「Android SDK ADT Bundle」內的「sdk」資料夾:點一下「sdk」資料夾→按「Choose」按鈕。


按「OK」按鈕完成Android SDK的設定。


相關使用檔案皆附加在個人GOOGLE雲端硬碟同名資料夾內

2013年11月4日 星期一

opencart Sellya模組安裝設定

參考網址
http://321cart.com/sellya/documentation/#!/documenter_cover


Sellya - OpenCart Responsive Premium Theme

Compatible with: OpenCart 1.5.2.1/1.5.3.1/1.5.4.1/1.5.5.1


Installation


Before you install this theme:
1. read the complete instruction
2. make sure you have installed and running the correct version of OpenCart
3. it is a good practice to backup your system
We recommend to use this theme on a new, clean installation or existing shops without custom core modifications.
---------------------------------------------
How to install Sellya Theme?
Step 1. Unzip your downloaded "Sellya-premium-opencart-theme.zip". There are subfolders structure:
Open the folder that corresponds to your OpenCart version and upload all the files from "FILES_TO_UPLOAD" to the root directory you have installed OpenCart in.

Step 2: Theme activation
Log in the OpenCart administration and activate the theme from System › Settings › Store tab › Template dropdown (select "sellya" from the list).

Step 3: Theme module installation
Go to Extension › Modules › Sellya Theme Control Panel and click on the 'install' link. Then enable the 'Sellya Theme Control Panel' module (click on the 'edit' link, change the status to 'Enabled' and click 'Save').

Step 4: Image size adjustment
Go to System › Settings › Image tab and input this values:


IMPORTANT: If you are not using a Cloud Zoom, input this values in 'Additional Product Image Size':

Step 5: Bestsellers, Featured, Latest, Specials images
190x190 - Content Column
40x40 - Left or Right Column

Step 6: Sellya Product Slider (if you do not use the Sellya Product Slider module, skip this step)
Go to Extension › Modules › Sellya Product Slider and input this values:

Step 7: Slideshow images (if you do not use the Slideshow module, skip this step)
Go to Extension › Modules › Slideshow and input this values:

Step 8: Manufacturers images (if you do not use the Manufacturers carousel, skip this step)
Go to Extension › Modules › Carousel and input this values:

Step 9: Category module
Go to Extension › Modules › Category and disable module for a Product Page:

Step 10: Background Pattern
Go to Extension › Modules › Sellya Theme Control Panel › Background Images › Body. Select 193 pattern number and click 'Save'.

How To and FAQ


Add another language

Step 1. Open file: catalog/language/english/english.php:
Step 2. Select and Copy lines 2-25:
and Paste to your language file (catalog/language/yourlanguage/yourlanguage.php).
Step 3. Translate text highlighted in green on your language:

How can I put contact details on the Main Menu?

Contact Block on the Main Menu collects data from Contact Block on the Footer.
Step 1. Go to Extension › Modules › Sellya Theme Control Panel > General Options > Main Menu > Contacts > Show Contacts and select “Yes” from the list.
Step 2. Go to Extension › Modules › Sellya Theme Control Panel > Footer > Contact Us and input your contacts.
Note: Contact Block on the Footer does not need to be turned on to contacts to be displayed on the Main Menu.

How can I set list view as default in category page?

Step 1. Open file: catalog/view/theme/sellya/template/product/category.tpl and find this piece of code (generally at the bottom of the category.tpl file):


Step 2. You should change: display('grid') to display('list'):


Step 3. Clear your browser cache to see the changes.

CSS Structure


Here is the list of css files that Sellya theme uses:
1. stylesheet.css - main stylesheet
2. stylesheet-mobile.css - main stylesheet for mobile devices
3. bootstrap.css - Twitter Bootstrap framework
4. camera.css - stylesheet for homepage slider
5. carousel.css - stylesheet for the carousel
6. cloud-zoom.css - stylesheet for the Cloud Zoom
7. dcaccordion.css - stylesheet for categories accordion
8. elastic_slideshow.css - stylesheet for the responsive slideshow
9. flexslider.css - stylesheet for homepage slider
10. tipTip.css - stylesheet for the Tooltip
11. ui.totop.css - stylesheet for the To Top button

JavaScript Structure


The custom javascript files are located in catalog/view/theme/sellya/js:
camera.js
cloud-zoom.js
jquery.bxSlider.js
jquery.dcjqaccordion.js
jquery.eislideshow.js
jquery.elastislide.js
jquery.flexslider-min.js
jquery.tipTip.js
jquery.ui.totop.js
lc_dropdown.js

Extra Skins


You can use the extra skins in two ways:
1. without customization;
2. with customizable.

1. Extra skins without customization.

Go to Extension › Modules › Sellya Theme Control Panel, select the skin you interesting and click "Save".
Using this option, you have the ability to customize the default skin only.

2. Extra skins with customizable.

Step 1. Go to Extension › Modules › Sellya Theme Control Panel and select the default skin. 
Step 2. Open the Extras/(skin_you_want_to_use)/admin settings folder.
Step 3. Input the values ​​shown in the screenshots to your 'Sellya Theme Control Panel' module and click "Save".
Now you can freely adjust the selected extra skin.

Blog Manager Support


If you install the Blog Manager module, follow these steps:
Step 1. Go to your Sellya download pack. Open the Extensions/Blog Manager folder and upload all the files from "FILES_TO_UPLOAD" to the root directory you have installed OpenCart in.

Step 2. Now you need to put Blog link at Main or Top Menu.
Main Menu:
Go to Extension › Modules › Sellya Theme Control Panel › General Options › Main Menu › Custom Links.
Input 'Blog' in 'Title' and 'index.php?route=blog/category/home' in 'url'.
Top Menu:
Open file catalog\view\theme\sellya\template\common\header.tpl
Find (in line 1336 for OpenCart 1.5.5.1):
and replace with this:
------------------------------------------------------------------------------------------------------------
Important:
* The Blog Manager module is not included with Sellya. You can buy this extension HERE.
* We don't provide technical support for Blog Manager module. Support for this extension, you can get HERE.
------------------------------------------------------------------------------------------------------------

Credits


Camera slideshow by Manuel Masia
Flexslider by Tyler Smith
jQuery bxSlider by Steven Wanderski
Elastislide by Manoela Ilic
DC jQuery Accordion by Design Chemical
Bootstrap by Twitter
Cloud Zoom by R Cecco
TipTip by Drew Wilson
UItoTop by Matt Varone
Patterns by Subtle Patterns
All icons by 321cart.com

Sellya Support


In order to streamline support requests and better serve you, we utilize a support ticket system. Every support request is assigned a unique ticket number which you can use to track the progress and responses online. For your reference we provide complete archives and history of all your support requests.